Deploying to AWS Amplify and Lambda from Self Managed GitLab CI/CD
NOTE: Things have changed. See the latest setup in the updated blog post.
Wanting to automate all of our deployments, we had to “find a way”.
After some iteration, here are the final solutions. This assumes you have created the app in the AWS console and just want to be able to deploy new releases.
Amplify
AWS Amplify doesn’t have support for self managed GitLab instances yet. This issue is tracked on AWS Amplify Github.
Create An AWS IAM User For Amplify
{
    "Version": "2012-10-17",
    "Statement": [
        {
            "Sid": "DeployAmplify",
            "Effect": "Allow",
            "Action": "amplify:StartDeployment",
            "Resource": "arn:aws:amplify:REGION:ACCOUNT_ID:apps/APP_ID/*"
        }
    ]
}
You will need to replace REGION, ACCOUNT_ID and APP_ID with the relevant
values.
You can also go further and limit to a specific branch if desired.
You may wish to grant your user less restrictive permission (for example, if you want the same credentials to be used to deploy multiple apps).
Configure GitLab CI/CD Variables
We chose to configure:
AWS_ACCESS_KEY_IDAWS_SECRET_ACCESS_KEYAWS_REGION
Set them to be protected and masked.
You could also define your APP_ID and BRANCH_NAME here if you wanted to.
Configure .gitlab-ci.yml
build-frontend:
stage: build
image: node:17.9.0-slim
tags:
- docker
script:
- apt-get update
- apt-get install zip -y
- cd web
- npm install
- npm run $ENVIRONMENT
- date > dist/version.html
- echo "JOB_ID=$CI_JOB_ID" > ../build.env
- cd dist
- zip -r ../../dist.zip *
artifacts:
paths:
- dist.zip
reports:
dotenv: build.env
rules:
- if: $CI_PIPELINE_SOURCE == "schedule"
when: never
- if: $CI_COMMIT_BRANCH == "master"
variables:
ENVIRONMENT: prod
- if: $CI_COMMIT_BRANCH == "test" || $CI_MERGE_REQUEST_SOURCE_BRANCH_NAME == "test"
variables:
ENVIRONMENT: test
deploy-frontend-amplify:
stage: deploy
image:
name: amazon/aws-cli
entrypoint: [""]
tags:
- docker
variables:
APP_ID: APP_ID
SOURCE_URL: $CI_API_V4_URL/projects/$CI_PROJECT_ID/jobs/$JOB_ID/artifacts/dist.zip?job=build-web&job_token=$CI_JOB_TOKEN
script:
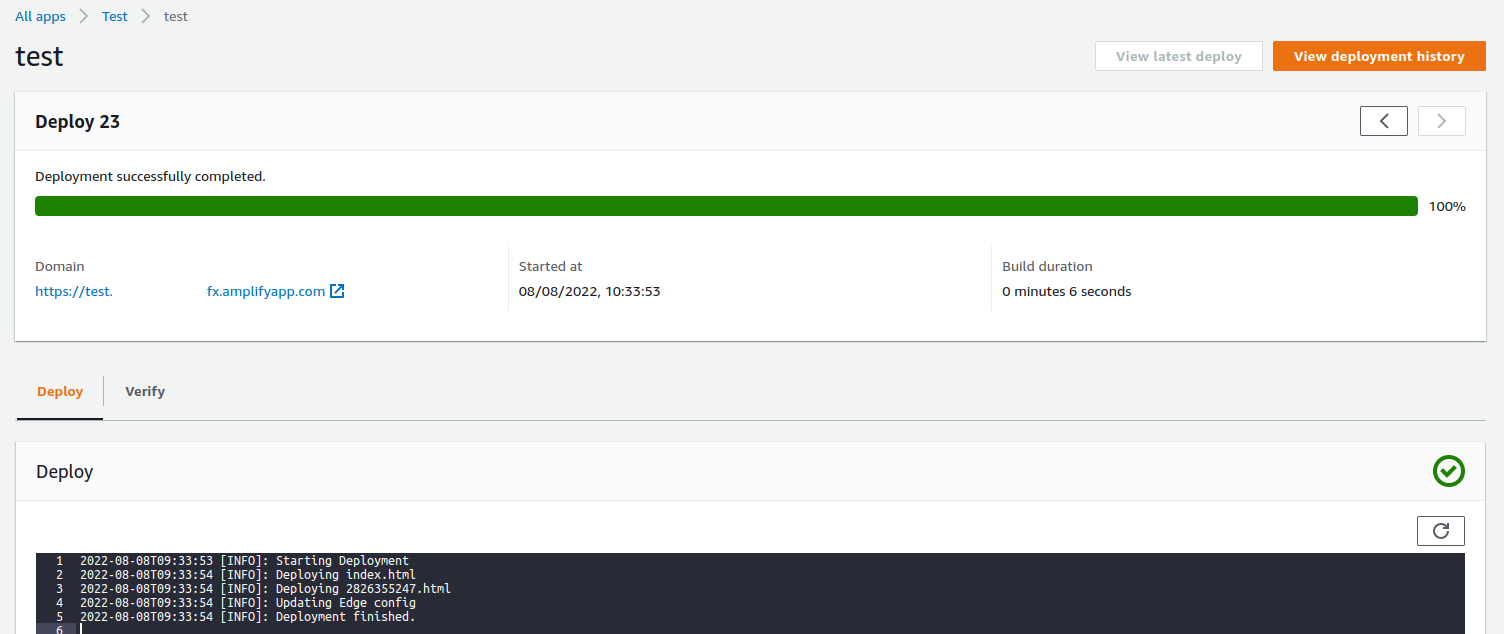
- aws amplify start-deployment --app-id $APP_ID --branch-name $BRANCH --source-url $SOURCE_URL
needs:
- build-frontend
rules:
- if: $CI_PIPELINE_SOURCE == "schedule"
when: never
- if: $CI_COMMIT_BRANCH == "master"
variables:
BRANCH: master
- if: $CI_COMMIT_BRANCH == "test" || $CI_MERGE_REQUEST_SOURCE_BRANCH_NAME == "test"
variables:
BRANCH: test
You will need to replace APP_ID, BRANCH_NAME and SOURCE_URL with the
relevant values.
That’s it!
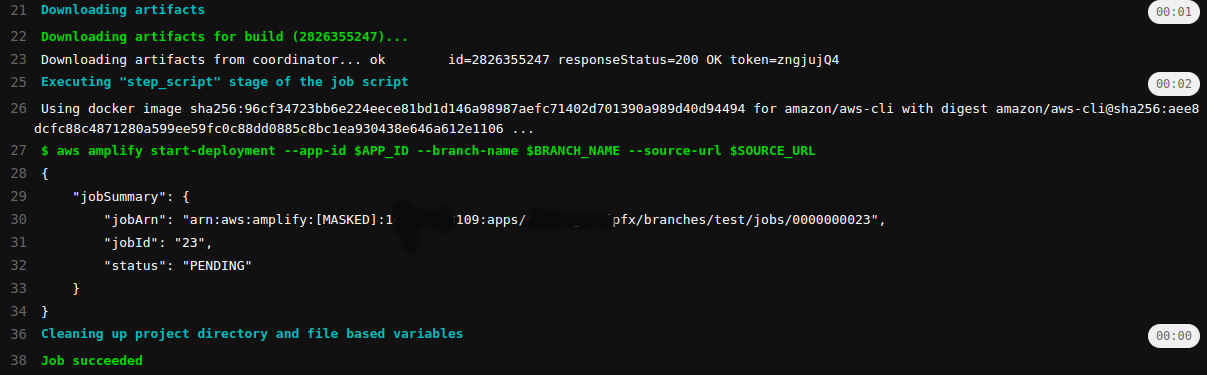
It’s fairly straightforward, but there’s a tiny bit of “magic”.
AWS Amplify requires a publicly accessible URL to download your project. We can achieve this by:
- Splitting the pipeline into multiple jobs.
- Storing build artifacts and the build job ID.
- Using the
$CI_JOB_TOKENto authorize the “private” artifact download endpoint.
Big shout out to Marco and Niklas from the GitLab community for helping us debug/troubleshoot and get this working.
While developing this solution we had some issues with AWS CLI:
root@a1b5517efdf2:/# aws amplify start-deployment --app-id abc123 --branch-name test --source-url "https://www.example.net/wp-content/uploads/2022/08/dist.zip"

Error parsing parameter '--source-url': Unable to retrieve https://www.example.net/wp-content/uploads/2022/08/dist.zip:
'utf-8' codec can't decode byte 0x9c in position 11: invalid start byte
Our solution initially was to use the AWS Ruby SDK:
require 'aws-sdk-amplify'

amplify = Aws::Amplify::Client.new
amplify.start_deployment({
  app_id: ENV["APP_ID"],
  branch_name: ENV["BRANCH_NAME"],
  source_url: ENV["SOURCE_URL"],
})
There may be a scenario where you would prefer to use the SDK, so we felt it was worth including this alternate approach.
It turned out we were using an old version of the CLI, and updating to latest version fixed the issue, allowing us to get rid of the custom Ruby solution.
Lambda
Setting up AWS Lambda is pretty much the same process as Amplify.
We will need to create another IAM user.
Create An AWS IAM User For Lambda
{
    "Version": "2012-10-17",
    "Statement": [
        {
            "Sid": "DeployLambda",
            "Effect": "Allow",
            "Action": "lambda:UpdateFunctionCode",
            "Resource": "arn:aws:lambda:REGION:ACCOUNT_ID:function:PROJECT_NAME*"
        },
    ]
}
You will need to replace REGION, ACCOUNT_ID and PROJECT_NAME with the
relevant values.
Configure GitLab CI/CD Variables
Similarly to Amplify, We chose to configure:
AWS_ACCESS_KEY_IDAWS_SECRET_ACCESS_KEYAWS_REGION
Set them to be protected and masked.
You could also define your APP_ID and BRANCH_NAME here if you wanted to.
Configure .gitlab-ci.yml for Lambda
deploy-backend-lambda:
  stage: deploy
  image: mcr.microsoft.com/dotnet/sdk:6.0
  tags:
    - docker
  script:
    - apt-get update
    - apt-get install awscli zip -y
    - cp $NUGET_CONFIG ./NuGet.Config
    - dotnet publish -c Release --self-contained false -r linux-arm64 -o publish
    - cd publish
    - zip -r ../publish.zip *
    - cd ..
    - aws lambda update-function-code --function-name $FUNCTION_NAME --zip-file fileb://publish.zip
  rules:
    - if: $CI_PIPELINE_SOURCE == "schedule"
      when: never
    - if: $CI_COMMIT_BRANCH == "master"
      variables:
        FUNCTION_NAME: ExampleProject
    - if: $CI_COMMIT_BRANCH == "test" || $CI_MERGE_REQUEST_SOURCE_BRANCH_NAME == "test"
      variables:
        FUNCTION_NAME: ExampleProjectTest
You will need to replace FUNCTION_NAME with the relevant values.
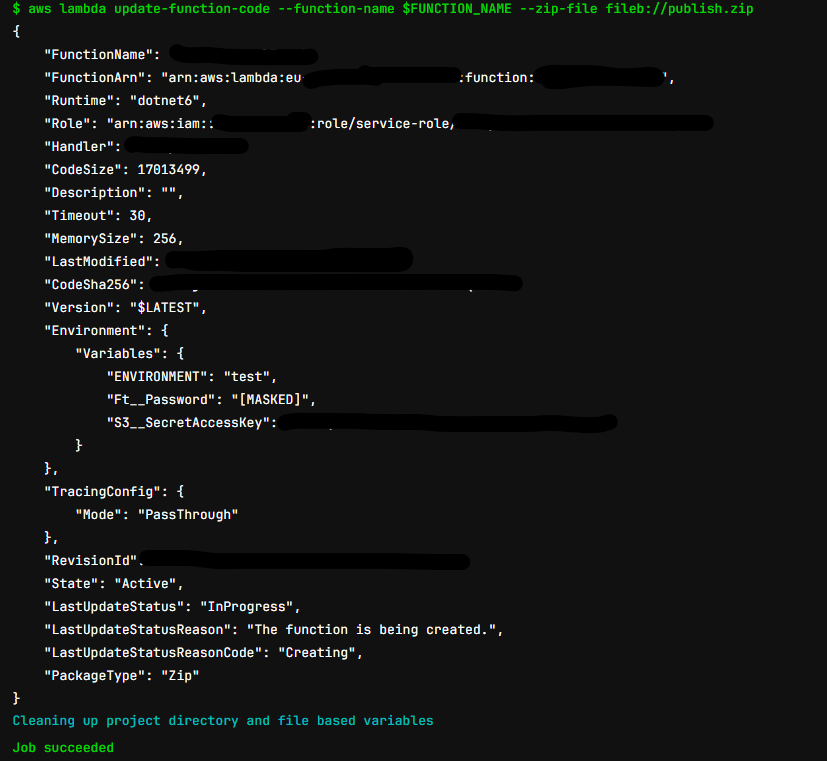
That’s it.